
photo courtesy of Pinterest (not mine)
I can't wait to see what combinations you come up with!
Happy Baking!

 |
| photo from serious eats |
 |
| photo from flickr |
 |
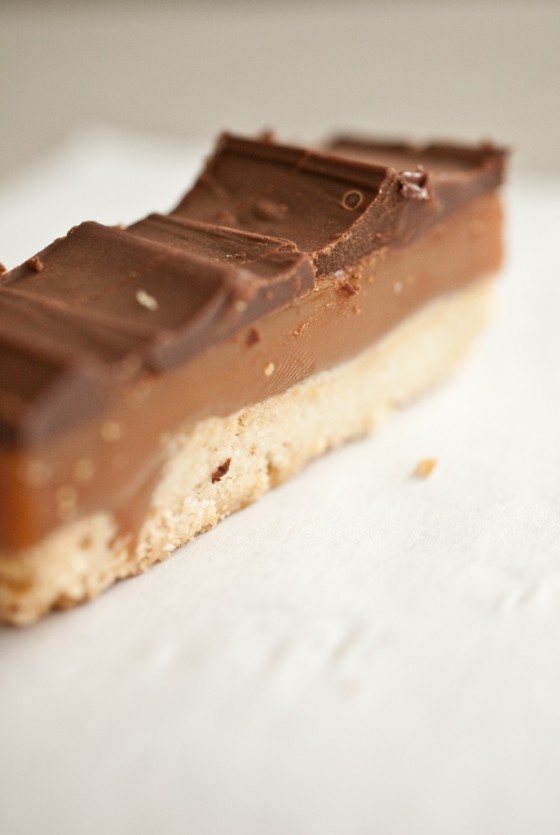
| photo from flickr |

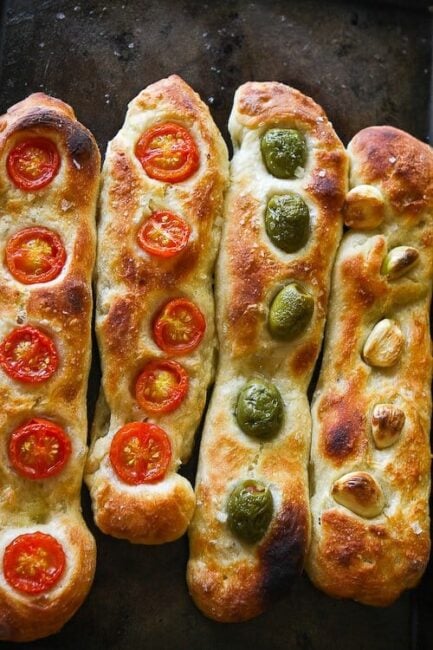
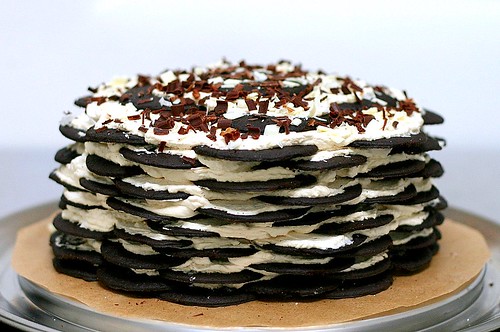 photo from Smitten Kitchen


 Cheese crackers are my weakness. I can sit and eat an entire box of cheez-its or better cheddars without an ounce of guilt. Ok, that part about the guilt is not true. As we all know, a box of crackers from the supermarket can't be all that healthy. I searched around and found a great post on The Kitchn with an easy recipe. If you can't have cheese or don't like cheese, feel free to make another kind of cracker.


 photo from Marthastewart.com
 Posted by - Brooke
I know I have been very remiss in my participation of the "Have the Cake" baking club. But I must admit I was very excited to be assigned the month of April. Not just because it means Spring is upon us, but given that Easter is around the corner, I have resurrected a recipe that my mom often made for Easter dinner dessert; Lemon Souffle with Raspberry Sauce . It is a recipe that she has handed down from her mother and so on... There are many versions of Souffle's both savory and sweet. The first recipe posted here is a cheese version my mother also taught me how to make. So take your pick savory or sweet. And there are a zillion takes on Souffles; chocolate, pumpkin, spinach. These are basics but I encourage everyone to think outside the box!***Just a brief note before I list the recipe. There are many variations of a cheese souffle. This can most certainly be made with Gruyere instead of plain Swiss and is also delicious prepared with a nice Cheddar cheese.
The souffle sauce base3 tbs butter
3 tbs flour1 cup boiling milk
1/2 tsp salt1/8 tsp pepper
A pinch of cayenne pepperA pinch of nutmeg
Melt the butter in the saucepan. Stir in the flour with a wooden spatula of spoon over moderate heat until the butter and flour foam together for about 2 minutes without browning. Remove from heat; when mixture has stopped bubbling, pour in all the boiling milk at once. Beat vigorously with a wire whip until blended. Beat in the seasonings. Return over moderate heat and boil, stirring with the wire whip, for one minute. Sauce will be very thick.4 egg yolks
Remove from heat. Immediately start to separate the eggs. Drop the whites into a bowl and the yolk into the hot sauce. Beat the yolk into the sauce with the wire whip. Continue in the same manner with the rest of the yolks. Dot top of sauce with butter.The egg whites and cheese
5 egg whitesa pinch of salt
3/4 cup (3 ounces) of coarsely grated Swiss or Swiss and ParmesanAdd an extra egg white to the ones in the bowl and beat with the salt until stiff. Stir a big spoonful (about a quarter of the egg whites) into the sauce. Stir in all but a tablespoon of the cheese. Delicately fold in the rest of the egg whites.
Baking Turn the souffle mixture into the mold which should be almost 3/4 full. Tap bottom of mold lightly on the table and smooth the surface of the souffle with a flat knife. Sprinkle the remaining cheese on the top. Set on a rack in the middle of the preheated oven and immediately turn heat down to 375. (Do not open the oven door for 20 minutes.) In 25 to 30 minutes the souffle will have puffed about 2 inches over the rim of the mold, and the top will be nicely browned. Bake 4 to 5 minutes more to firm it up. Serve at once! So I know this recipe sounds "involved" and it is. Might take a few times to master the perfect "pouf". And honestly if it falls your first time chances are it will probably taste as good just won't look as "pretty'. But this is a perfect dinner paired with a simple salad. Now onto my mothers other souffle recipe. This one is MUCH easier and the perfect light Spring dessert. This souffle doesn't "bake" as most traditional souffles do, it sets in the refrigerator.
Cold Lemon Souffle
For 6-8 people
2 envelopes of gelatin
1/2 cup of cold water and 1/2 cup of lemon juice - total 1 cup8 yolks
3/4 lemon juice and grated rind of lemons used8 egg whites
1 cup of sugar1 cup heavy cream 3 tbs of sugar
Sprinkle gelatin into 1/2 of water and 1/2 lemon juice. Beat yolks until thick then beat in softened gelatin. Cook mixture until it coats the spoon but don't let it boil. Quickly add lemon juice and grated lemon rind mixture, transfer to a large bowl and chill in the freezer until it becomes syrupy ( + or - 1/2 hour). Beat whites until they froth then add the cup of sugar slowly and beat until quite stiff. Whip the cream with the 3 tablespoons of sugar. Fold cream into the lemon mixture then egg whites. Tie wax paper collar 2 inches above the rim of a 1 1/2 quart souffle dish. Pour mixture up to the top of the collar and chill in the refrigerator for at least four hours. remove collar carefully. Optional: Sprinkle a little cocoa powder on the top to imitate crust. Serve with sweetened pureed raspberry sauce.1 tablespoon of lemon juice
1 tablespoon of cognac or Framboise liquorCombine raspberries, sugar and (optional liquor). Cook until raspberries are broken down. Remove from the heat and strain through a chinois to eliminate seeds. Sauce should be cooled a bit before serving.
So happy souffle making everyone! Hope everyone achieves the perfect "pouf"!


 |
| I used my ricer to get my potatoes super smooth |


 image via Real Simple


|
|
|
|
|
|
|
|
|
|
|
|
|
|
|
|
|
|